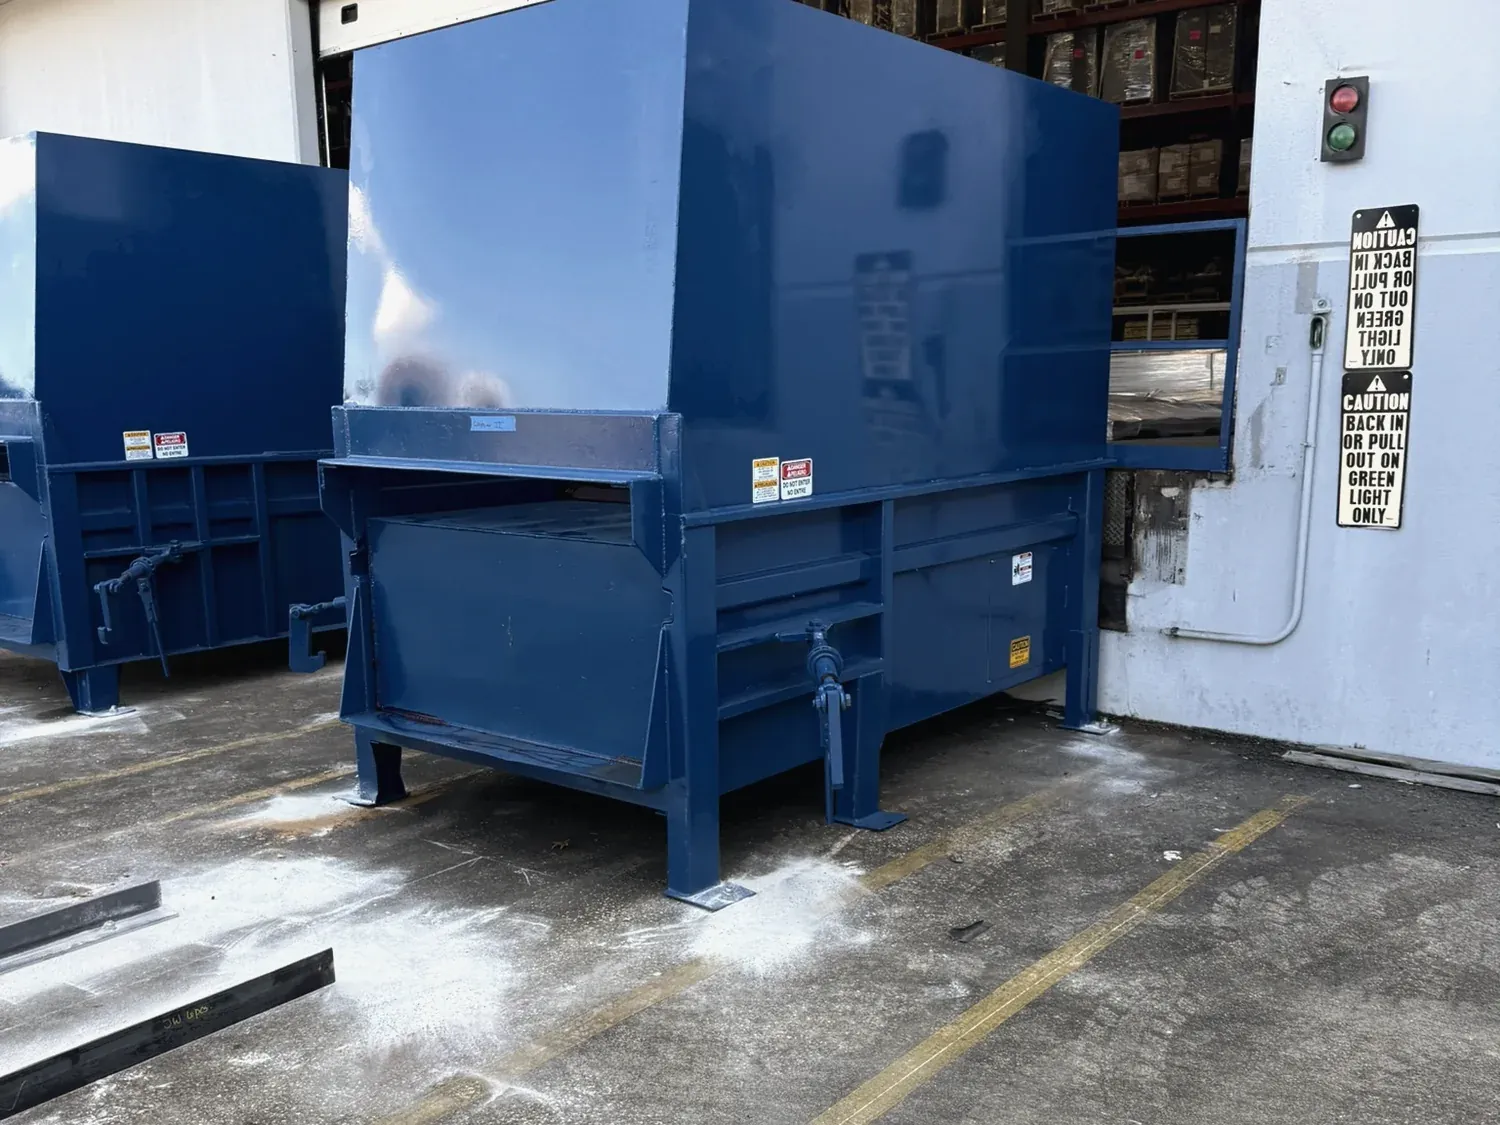
Plan a commercial compactor installation around the exact machine and its manufacturer-approved drawings. Confirm the waste stream, concrete foundation, electrical service, loading arrangement, service clearance, drainage, and hauler access before delivery. Coordinate the supplier, hauler, installers, and qualified trades before site work begins.
In this guide
Buying the commercial compactor is only part of the project. The site around it determines whether the system will be convenient to load, practical to service, safe to operate, and accessible to the waste hauler. Poor planning can create problems that last for the entire life of the equipment. A compactor installed a few feet in the wrong direction can interfere with truck access. Incorrect electrical planning can delay startup. A poorly designed loading area can create unnecessary labor every day. An inadequate foundation can become a major problem after thousands of pounds of equipment have already been placed on it. The best time to solve those problems is before the compactor arrives. This guide covers the major questions a business should answer when planning a commercial trash compactor installation.
First, Know Exactly Which Compactor You Are Installing
Do not begin pouring concrete or running electrical service based on generic commercial compactor specifications. Installation requirements can vary based on:
- Manufacturer
- Model
- Compactor type
- Container size
- Loading configuration
- Power unit
- Site design
- Accessories
- Local requirements
Use the manufacturer-approved installation documentation for the exact machine being installed. A stationary compactor and a self-contained compactor may perform similar volume-reduction functions, but the way they interact with the container, site, hauler, and waste stream can be very different. Equipment selection should come before final site preparation.
Stationary vs. Self-Contained Compactor Installation
Understanding the type of compactor is one of the first steps in planning the site.
Stationary Compactor
With a stationary compactor, the compaction unit generally remains at the facility while the receiving container is disconnected and hauled away. The installation must account for:
- Compactor-to-container alignment
- Container connection and disconnection
- Container removal
- Truck approach
- Container pullout space
- Loading access
- Service access
Stationary compactors are commonly used for appropriate dry waste applications.
Self-Contained Compactor
A self-contained compactor combines the compaction section and container into a unit that can be transported together. These systems are commonly considered for appropriate applications involving wet waste or materials where leakage and sanitation are greater concerns. Site planning may need to consider:
- Hauler access
- Electrical connections
- Loading height
- Container movement
- Drainage
- Sanitation
- Cleaning access
- Service access
The correct choice should be based on the waste stream first.
Step 1: Conduct a Detailed Site Survey
A good installation begins with understanding the property. Before finalizing the compactor location, document:
- Proposed equipment location
- Building walls
- Loading docks
- Exterior doors
- Existing concrete
- Electrical service
- Drainage
- Fences
- Gates
- Curbs
- Bollards
- Utility lines
- Overhead obstructions
- Vehicle traffic
- Employee traffic
- Loading zones
- Hauler approach
- Container pullout path
Photographs and accurate measurements can save significant time later. For more complex projects, a marked site plan can help coordinate the facility, equipment supplier, waste hauler, electrician, concrete contractor, fabricator, and installation team. The question should not simply be: "Where can we fit the compactor?" A better question is: "Where can this entire waste-handling system operate efficiently?"
Step 2: Verify Foundation and Concrete Requirements
Commercial compactors place significant loads on their mounting surfaces. The manufacturer may specify requirements involving:
- Concrete thickness
- Concrete strength
- Reinforcement
- Pad dimensions
- Equipment anchoring
- Anchor locations
- Levelness
- Equipment orientation
- Drainage
These requirements should be verified for the exact machine. Do not copy the concrete specifications from another compactor simply because the equipment looks similar. Different machines and installations can have different foundation requirements. If a new concrete pad is being installed, make sure the concrete contractor receives the correct equipment drawing before the pour. Fixing a foundation problem before concrete is poured is relatively simple. Fixing it after the compactor arrives is not.
Step 3: Get the Waste Hauler Involved Early
One of the biggest installation mistakes is planning the compactor without involving the company that must remove the container. The waste hauler should review the proposed location before the installation is finalized. The truck may need sufficient room to:
- Approach the container
- Align with it
- Connect to it
- Load it
- Pull it away from the compactor
- Turn
- Return the container
- Exit the property safely
Potential obstacles include:
- Employee parking
- Customer parking
- Fences
- Landscaping
- Utility poles
- Other dumpsters
- Loading docks
- Delivery trucks
- Narrow gates
- Tight corners
- Buildings
- Overhead obstacles
A commercial compactor can be installed perfectly and still become a daily headache if the hauler cannot easily reach it.
Step 4: Think About the Container Pullout Path
The space directly in front of or behind the equipment is not the only area that matters. The container needs a complete travel path. Ask:
- Is the pullout path straight?
- Is there enough room for the truck?
- Will parked vehicles block access?
- Does the truck have to cross employee traffic?
- Is another loading dock in the way?
- Could future construction affect access?
- Is the surface appropriate for heavy truck traffic?
This is especially important at busy facilities where deliveries, employees, customers, waste trucks, and forklifts may all use the same area. Waste collection should be designed into the traffic plan.
Step 5: Check Overhead Clearance
Do not only look at the ground. Depending on the site and hauling equipment, overhead clearance may be important. Look for:
- Power lines
- Communication lines
- Roof overhangs
- Canopies
- Trees
- Signs
- Lighting
- Pipes
- Building structures
- Other overhead equipment
The waste hauler should verify the clearance needed for their specific collection equipment. Do not assume an area is suitable because a truck can physically drive into it.
Step 6: Plan Electrical Service for the Exact Machine
Commercial compactors require electrical service that matches the equipment. Manufacturer documentation may specify:
- Voltage
- Phase
- Full-load amperage
- Disconnect requirements
- Control requirements
- Motor specifications
- Conduit
- Overcurrent protection
- Other electrical components
The electrical installation should be completed by qualified personnel and should meet applicable codes and manufacturer requirements. Do not assume an existing electrical connection from an older compactor will automatically work for the replacement machine. Verify everything. A mistake discovered before electrical work begins costs far less than one discovered during equipment startup.
Step 7: Position Controls and Disconnects Properly
The location of the operator controls and electrical disconnect affects both everyday use and future service. The operator needs a practical and safe place to control the equipment. Technicians need appropriate access for service and energy isolation. Plan control and disconnect locations before equipment installation and electrical work are finalized. The exact requirements will depend on the equipment and applicable standards.
Step 8: Consider Drainage Before Installing Wet-Waste Equipment
Drainage can become especially important when the waste stream contains liquids or wet material. Depending on the application and local requirements, site planning may need to address:
- Pad slope
- Drain location
- Washdown
- Cleaning
- Sanitary sewer connections
- Leak containment
- Wastewater requirements
- Local environmental requirements
A self-contained compactor can help control appropriate wet waste, but the surrounding site still needs to support the operation. The area should not become a collection point for dirty water, leaking waste, or cleaning runoff. Local requirements should be verified before drainage systems are designed or connected.
Step 9: Decide How Employees Will Load the Compactor
How waste reaches the compactor can have a major impact on labor and safety. Common loading configurations can include:
- Ground loading
- Dock loading
- Through-wall loading
- Chutes
- Hoppers
- Carts
- Cart tippers
- Conveyor systems
- Custom loading arrangements
Ask:
- Where is the waste generated?
- How does it reach the compactor today?
- Who moves it?
- How heavy are the carts or containers?
- How many trips are made per shift?
- Is the loading height practical?
- Would a cart tipper improve the process?
- Is custom fabrication needed?
- Are employees crossing vehicle traffic?
- Is material being handled more times than necessary?
The best compactor installation is not simply the one where the machine fits. It is the one where material reaches the machine efficiently.
Step 10: Study the Daily Waste Flow
Before deciding where the compactor should go, watch the waste move through the facility. For example, does an employee:
- Remove waste from the production area?
- Put it into a cart?
- Move the cart to a staging area?
- Transfer it into another container?
- Move that container again?
- Finally load the compactor?
Every unnecessary material-handling step consumes labor. A better compactor location or loading configuration may eliminate repeated movement. Over months and years, reducing those movements can be more valuable than saving a small amount on the original installation.
Step 11: Plan for Safety Guarding and Access Control
Commercial compactors should be installed so employees can use them according to manufacturer instructions. Depending on the application, the installation may include:
- Gates
- Guardrails
- Hoppers
- Loading doors
- Interlocks
- Bollards
- Fencing
- Access control
- Warning signage
- Elevated loading protections
Custom fabrication around the equipment should preserve the intended safe operation of the machine. Do not casually modify a guard, gate, interlock, or other safety-related component simply because it interferes with the desired layout. The layout needs to work around safe operation.
Step 12: Consider Employee and Vehicle Traffic
Waste equipment often sits near areas with significant activity. That may include:
- Delivery trucks
- Forklifts
- Employees
- Customers
- Vendors
- Waste haulers
- Shipping traffic
Consider how these groups interact. Ask:
- Will employees stand in a truck travel lane while loading?
- Will forklifts cross in front of the compactor?
- Could a customer enter the equipment area?
- Does the hauler arrive during receiving hours?
- Will waste carts block emergency access?
- Could the container interfere with another loading dock?
A good site design considers the area as a working environment, not just an equipment pad.
Step 13: Protect the Equipment From Vehicle Damage
Commercial waste equipment frequently operates around trucks, forklifts, loaders, and other heavy machinery. That creates impact risk. Depending on the site, protective measures such as bollards may help protect:
- Electrical controls
- Disconnects
- Hydraulic components
- Power units
- Building walls
- Loading controls
- The compactor
Protection should be positioned so it does not interfere with:
- Container removal
- Service access
- Operator access
- Hauler operation
The goal is protection without creating another obstacle.
Step 14: Leave Enough Room for Maintenance
One of the easiest installation mistakes is placing a machine in the tightest space possible. That may maximize usable floor space on day one. It can make maintenance far more difficult for the next 15 years. Service technicians may need access to:
- Electrical controls
- Hydraulic components
- Motor
- Pump
- Cylinder
- Hoses
- Sensors
- Mechanical components
- Container connection points
Follow manufacturer clearance requirements and consider practical technician access. If a fence, wall, dumpster, or piece of production equipment must be removed every time the compactor needs service, the layout needs more thought.
Step 15: Plan Equipment Delivery Before Delivery Day
Commercial compactors are heavy industrial equipment. The delivery itself should be planned. Determine:
- Where the delivery truck will enter
- Where the equipment will be unloaded
- Whether a crane is required
- Whether a forklift is required
- Whether specialized rigging is required
- Whether the truck can reach the final location
- Whether parking or traffic must be temporarily blocked
- Whether permits are required
- Whether installation will interfere with normal business operations
For indoor or restricted installations, measure the entire delivery path. That can include:
- Doors
- Hallways
- Gates
- Ceiling clearance
- Turning radius
- Floor capacity
- Dock dimensions
Do not only measure the final equipment location. The machine has to get there first.
Step 16: Coordinate Rigging and Installation
The installation may involve several different trades or companies. Potential participants include:
- Equipment supplier
- Riggers
- Electricians
- Concrete contractors
- Fabricators
- Waste hauler
- Facility maintenance
- General contractor
- Crane operator
Coordination matters. A simple sequence might involve:
- Site survey
- Final equipment selection
- Manufacturer drawings approved
- Hauler approves access
- Concrete work completed
- Electrical work prepared
- Equipment delivered
- Equipment rigged into position
- Equipment anchored
- Electrical connection completed
- Container positioned
- System tested
- Operators trained
The exact process will vary by project. The important point is to coordinate the work before everyone arrives on site.
Step 17: Make Sure the Compactor and Container Align Properly
For stationary systems, alignment between the compactor and receiving container is critical. Poor alignment can contribute to:
- Connection problems
- Leakage
- Excessive wear
- Material spillage
- Difficulty swapping containers
- Equipment damage
Alignment should be verified during installation and commissioning. The container needs to repeatedly return to the correct position after hauling. The system should not depend on employees improvising every time the container comes back.
Step 18: Check Loading Height and Dock Compatibility
Dock-loading installations require additional planning. Verify:
- Dock height
- Compactor loading opening height
- Hopper dimensions
- Gate or door location
- Employee access
- Fall protection requirements
- Cart movement
- Dock traffic
- Service access
If the compactor is being loaded through a wall or from an elevated area, coordination between equipment drawings and building dimensions becomes even more important. Small dimensional mistakes can create large fabrication problems.
Step 19: Think About Weather Exposure
If the compactor is outdoors, consider the environment. Potential issues include:
- Rain
- Standing water
- Extreme heat
- Cold
- Direct sunlight
- Corrosive environments
- Debris
- Snow or ice in colder climates
The equipment should be appropriate for the intended environment. Electrical systems, controls, coatings, hydraulic components, and the surrounding site may all need to account for exposure. Follow manufacturer recommendations for the specific installation.
Step 20: Test the Complete System Before Normal Use
The installation is not complete simply because the compactor is anchored and connected to power. The complete system should be commissioned. Depending on the machine, testing may include:
- Electrical operation
- Hydraulic operation
- Compaction cycle
- Operator controls
- Emergency stop
- Interlocks
- Safety devices
- Sensors
- Limit switches
- Container connection
- Loading equipment
- Hopper operation
- Cart tipper operation
- General equipment condition
Any problems found during commissioning should be addressed before the equipment enters normal production. It is much easier to correct installation problems while the installation team is still on site.
Step 21: Train the Employees Who Will Actually Use the Compactor
Operator training is part of the installation. Employees should understand the requirements of the specific machine they will use. Training may include:
- Normal startup
- Normal loading
- Approved materials
- Prohibited materials
- Control operation
- Emergency stop
- What warning signs should be reported
- What employees should never attempt
- Who to contact when something goes wrong
Do not assume employees know how to use the new machine because they used the old one. Controls, safety devices, loading procedures, and equipment behavior may be different.
Step 22: Establish a Maintenance Plan From Day One
Do not wait until the first breakdown to think about service. Record:
- Manufacturer
- Model
- Serial number
- Installation date
- Service contact
- Warranty information
- Maintenance recommendations
- Inspection schedule
- Electrical information
- Hydraulic information
- Container information
A preventive maintenance plan can help identify developing problems before they create unplanned downtime. New equipment still needs maintenance.
Common Commercial Compactor Installation Mistakes
Choosing the location before talking to the hauler
The container needs to be removed and returned repeatedly. Hauler access should be verified early.
Pouring concrete before receiving the correct equipment drawings
The pad should match the exact machine.
Assuming existing electrical service will work
Verify electrical requirements for the new equipment.
Installing too close to walls or fences
Leave required operating and service clearances.
Ignoring drainage
Wet waste applications can create sanitation problems if the surrounding site is poorly designed.
Forgetting about delivery access
The machine has to physically reach the installation location.
Designing for the machine instead of the workflow
The compactor is part of a larger waste-handling process.
Ignoring future growth
If the facility is expanding, make sure the location and system can support realistic future demand.
Failing to train operators
A properly installed machine can still be used incorrectly.
Commercial Compactor Installation Checklist
Equipment
- Exact manufacturer confirmed
- Exact model confirmed
- Stationary or self-contained confirmed
- Container size confirmed
- Loading configuration confirmed
- Manufacturer installation drawings obtained
Site
- Proposed location measured
- Building clearance checked
- Overhead clearance checked
- Service access confirmed
- Employee traffic reviewed
- Vehicle traffic reviewed
- Delivery path reviewed
Concrete
- Manufacturer foundation requirements confirmed
- Pad dimensions confirmed
- Concrete contractor has correct drawings
- Anchoring requirements confirmed
- Levelness requirements confirmed
- Drainage considered
Electrical
- Voltage confirmed
- Phase confirmed
- Amperage confirmed
- Disconnect requirements confirmed
- Control location confirmed
- Qualified electrical contractor scheduled
Waste Hauler
- Hauler reviewed the proposed location
- Truck approach confirmed
- Pullout space confirmed
- Turning area confirmed
- Container compatibility confirmed
- Overhead clearance reviewed
- Return and alignment process confirmed
Loading
- Ground, dock, chute, hopper, or other loading method confirmed
- Operator access reviewed
- Cart movement reviewed
- Guarding requirements reviewed
- Custom fabrication identified
- Loading height confirmed
Drainage and Sanitation
- Waste stream evaluated
- Wet waste needs reviewed
- Drainage needs reviewed
- Cleaning access considered
- Applicable local requirements confirmed
Delivery and Rigging
- Freight scheduled
- Delivery route confirmed
- Rigging plan completed
- Crane needs confirmed
- Forklift needs confirmed
- Work area available for installation
Startup
- Equipment positioned correctly
- Equipment anchored
- Electrical connection completed
- Controls tested
- Hydraulic operation tested
- Safety devices tested
- Emergency stop tested
- Compaction cycle tested
- Container connection checked
- Loading system tested
- Operators trained
- Maintenance information documented
- Service contact information provided
A Good Compactor Installation Starts Before the Machine Arrives
A successful commercial compactor installation is a coordinated project. The machine is only one piece. The equipment, site, concrete, electrical service, container, loading process, waste hauler, operators, technicians, and waste stream all have to work together. That is why site preparation deserves as much attention as the equipment purchase. Norton Equipment Company has worked with commercial waste and recycling equipment since 1997. Our capabilities include commercial compactors, installation, equipment service, repair, rigging, logistics, fabrication, refurbishment, and waste equipment support throughout the Mid-South. Because Norton works with the complete equipment lifecycle, our team can look beyond the machine itself and help identify installation concerns before they become expensive problems. If you are planning a new commercial compactor installation or replacing an existing compactor, contact Norton Equipment Company before site work begins. We can help evaluate the equipment, waste stream, location, loading process, access requirements, and installation needs before the machine reaches your property.
